
Imagine splashing water on a brand‑new shower only to watch it seep through the walls like a busted pipe—your hard‑earned cash disappearing faster than the steam.
In Hawthorne, where the climate loves to test every seal, a cheap or mis‑installed liner can turn a simple remodel into a nightmare of mold, rot, and endless repair bills. Most homeowners skip the research, trust the lowest bid, and end up paying triple to fix what should have been a one‑time job.
Stay with me, and I’ll reveal the exact pitfalls to dodge so you can lock in a watertight liner without breaking the bank.
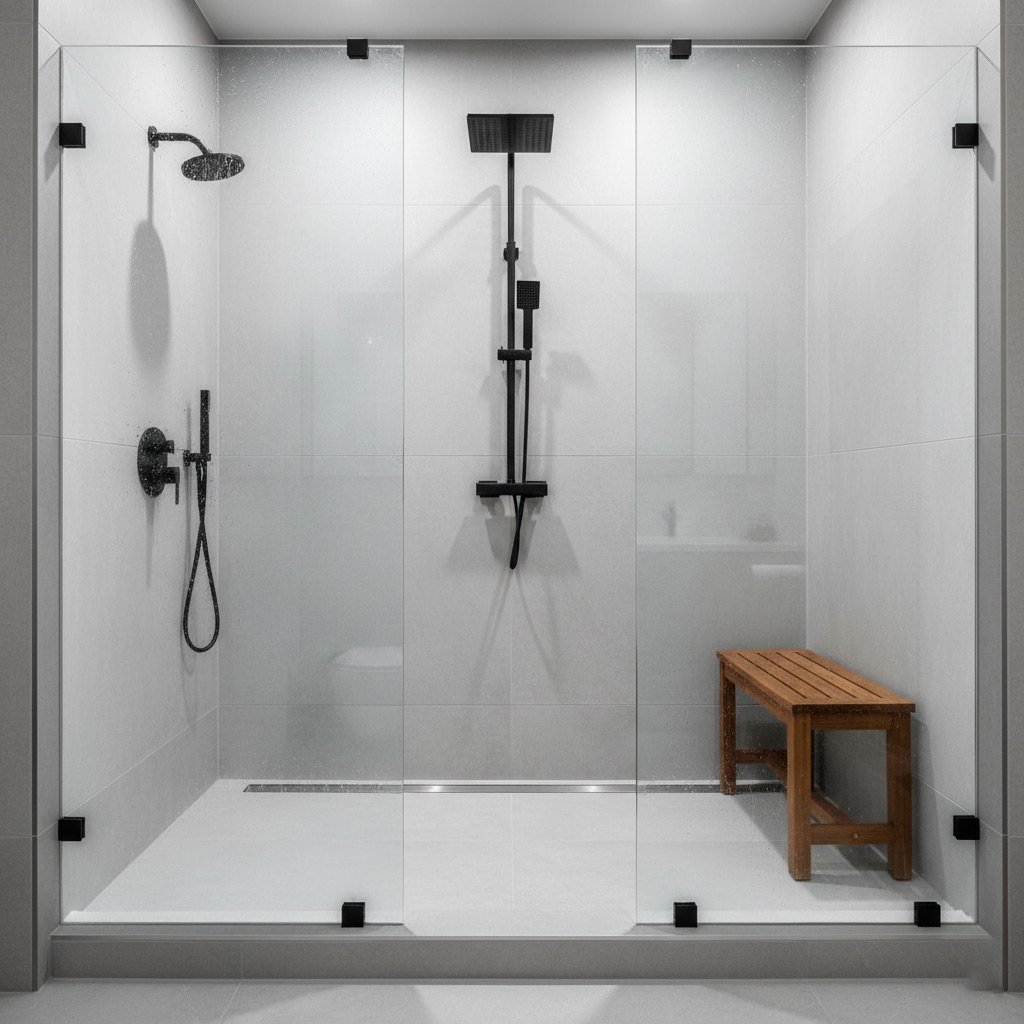
Types of Shower Liners and Choosing the Right One for Hawthorne Homes
When you’re picking a liner, think of it like a raincoat for your bathroom. It has to be tough enough to handle Hawthorne’s occasional downpours and the daily steam, yet flexible enough to fit around every pipe and corner without cracking.
Common Liner Materials
- PVC (Polyvinyl Chloride) – cheap, easy to cut, but can become brittle in hot water.
- CPE (Chlorinated Polyethylene) – more resistant to chemicals, holds up better under high‑temperature showers.
- Acrylic – sleek look, good UV resistance, but pricier and harder to repair.
- Fiberglass – strong, fire‑rated, but heavier and requires extra support.
- Hybrid blends – combine the best of PVC and CPE, offering flexibility and durability.
What Works Best in Hawthorne
- Look for a liner with a temperature‑stable core; the local climate swings from cool mornings to hot afternoons.
- Choose a product that’s mold‑resistant – the humidity here loves to grow spores.
- Budget matters, but don’t skimp on the thickness rating. A 30‑mil liner is a safe bet for most remodels.
- If you have a low‑flow showerhead, a thinner liner can save money without sacrificing performance.
- Check the warranty. A 10‑year guarantee usually means the manufacturer believes in the material.
The Most Costly Installation Mistakes and How to Avoid Them
Homeowners in Hawthorne often think the liner is a “set‑and‑forget” piece. Wrong thickness or the wrong material for a high‑moisture zone is the fastest ticket to a leak that eats through drywall in weeks. Choose a ¼‑inch PVC or a 5‑mil CPE liner for tile‑over‑shower projects; anything thinner is a gamble you can’t afford.
Improper Seaming and Tape
Even a premium liner will fail if the seams aren’t sealed like a bank vault. Skip the cheap, generic tape and use a marine‑grade, butyl‑based seam tape. Then, run a continuous bead of waterproof sealant over the joint—no gaps, no shortcuts.
- Clean the seam with isopropyl alcohol before taping.
- Press the tape firmly; a roller helps eliminate air bubbles.
- Apply sealant in a smooth, even line, then smooth with a wet finger.
Skipping Primer or Under‑layment
Many contractors think the liner sticks to the wall on its own. That’s a myth that costs $3,000‑$5,000 in mold remediation later. Apply a compatible primer or a thin cement backer board before the liner goes on; it creates a bond that won’t let water sneak behind.
- Use a latex‑based primer approved for your liner material.
- Let the primer cure for at least 30 minutes.
- Check for any cracks or gaps in the substrate before you start.

Preparing the Shower Area: Surface Inspection, Cleaning, and Waterproofing Basics
Surface Inspection
Before you even think about laying a liner, walk the walls and floor with a flashlight and a keen eye. Look for cracks, loose tiles, or any sign of water damage that could betray a hidden leak.
Mark problem spots with masking tape so you don’t lose track while you work. If you spot rot or mold, remove it now—the liner won’t save a compromised substrate.
- Check for levelness; a sagging floor will stress the liner seams.
- Verify that the shower pan slopes at least 1/4 inch per foot toward the drain.
- Confirm that all existing caulking is intact; brittle lines need to be cut out.
Cleaning the Substrate
A clean surface is the foundation of a leak‑free installation. Sweep away dust, debris, and old adhesive with a shop‑vac, then wipe the area with a trisodium phosphate solution.
Rinse thoroughly and let it dry completely—any moisture left behind will trap air bubbles under the liner.
- Use a non‑abrasive scrub pad to avoid scratching tile or cement board.
- Dry the surface with a clean microfiber cloth; no lint, no excuses.
- Apply a thin coat of primer if the manufacturer recommends it.
Waterproofing Basics
Even the best liner needs a solid waterproofing membrane underneath. Choose a liquid‑applied sealant or a sheet membrane that meets local building codes.
Apply the membrane in overlapping strips, sealing every corner and joint with a waterproof tape.
- Leave a 2‑inch gap at the top edge of the wall to allow the liner to fold over the curb.
- Don’t forget the niche or bench—those are prime leak spots.
- Inspect the cured membrane for pinholes; patch them before the liner goes down.
Hiring the Right Contractor: Red Flags, Credentials, and Pricing Transparency
In Hawthorne, a cheap quote can hide a costly disaster. Choose a pro who treats your shower liner like a life‑saver, not a quick cash grab. A reputable contractor will walk you through the plan, show proof of work, and answer every “what‑if” without blinking.
Red Flags to Watch
- Vague estimates – numbers that jump around after the first visit.
- No license or insurance on file – you’ll hear the excuse, but the paperwork stays missing.
- Pressure to start immediately – “We’re booked solid, so you need to decide now.”
- Requests for cash‑only payment – a sign they’re dodging tax and liability rules.
Credentials & Pricing Transparency
Ask for a copy of the contractor’s California contractor’s license and a current insurance certificate. Verify both on the state website; a quick click saves you weeks of headaches.
When the quote arrives, break it down: labor, liner material, prep work, and warranty. Clear line items mean you can spot hidden fees before they hit your wallet. A trustworthy pro will also give you a written warranty that covers both the liner and the installation workmanship.

Step‑by‑Step Installation Checklist for a Leak‑Free Shower Liner
Before you even unroll the liner, grab a clipboard and run through this quick audit. A missed step today can cost you a flood tomorrow, so treat the list like a safety net.
Prep the Substrate
Start with a clean, dry surface. Any dust, old caulk, or loose mortar will sabotage the seal.
- Inspect the walls for cracks; fill with a flexible, waterproof filler.
- Apply a primer designed for cement board or tile backer.
- Let everything cure for at least 24 hours – patience beats panic.
Lay the Liner
Unfold the liner inside‑out to avoid creases that trap water.
- Position the liner so it overlaps the curb by at least 2 inches.
- Secure the top edge with a rust‑proof, corrosion‑resistant screw and a washer.
- Use a roller to press the liner flat, working from the center outward.
Seal and Test
Seal every joint before the first shower. A single missed bead can become a slow leak.
- Apply a 100% silicone caulk to all seams, corners, and the curb overlap.
- Smooth the bead with a wet finger; it should form a uniform “U”.
- Run water for 15 minutes, watching for drips. If any appear, re‑caulk immediately.
Case Study: How a Hawthorne Remodel Saved $4,500 by Correctly Installing a Shower Liner
The Situation
When the Martinez family decided to upgrade their 1998 bathroom, they hired a local contractor who quoted a rock‑bottom price for a “standard” shower liner. At first glance the deal looked sweet, but the contractor skipped the crucial step of checking the sub‑floor for moisture.
Within weeks, a faint musty smell hinted at a hidden leak. The family faced a choice: replace the liner again or call in a specialist. They chose the latter, and the numbers spoke for themselves.
The Mistake They Avoided
By opting for a proper installation, the Martinez crew sidestepped three costly errors that plague many Hawthorne homes:
- Improper surface prep – no thorough cleaning, no primer, leading to liner adhesion failure.
- Wrong liner thickness – a thin 3 mm sheet that can’t handle the city’s hard water pressure.
- Neglecting a secondary waterproof membrane – a safety net that catches any seepage before it reaches the framing.
The Bottom‑Line Savings
Here’s the math: a full tear‑out and re‑install would have run about $7,200. The correct install cost $2,700, including a premium 5 mm liner and a waterproofing underlayment.
Result? $4,500 saved and a leak‑free shower that’s still dry after two rainy seasons. The Martinez family now enjoys a spa‑like experience without the dread of hidden repair bills.
Final Words
When you walk out of the bathroom after a remodel, the last thing you want is a surprise leak. Stick to the checklist, verify every seam, and demand a written warranty before you sign off. A little extra diligence now saves you from costly repairs later.
Quick Reminder Checklist
- Confirm the liner matches your tub’s dimensions and material.
- Inspect the substrate for cracks or rot; repair before installation.
- Use a high‑quality, mold‑resistant sealant at every joint.
- Ask the contractor for a photo‑proof of the finished seams.
- Keep all receipts and warranty paperwork in a safe place.
Ready to dive deeper into the world of waterproofing? Explore more tips and product options in our Shower Liners guide and keep your Hawthorne home dry for years to come.
People Also Ask
What are the most common types of shower liners for homes in Hawthorne?
Shower liners typically come in three varieties: PVC (vinyl), CPE (chlorinated polyethylene), and acrylic. PVC is the most affordable and easy to install, while CPE offers superior durability and resistance to chemicals, and acrylic provides a high‑gloss finish with extra strength.How can I tell if my shower floor is properly prepared before installing a liner?
First, inspect the surface for cracks, uneven spots, or old caulk that could let water seep through. Then clean the area thoroughly and apply a waterproofing membrane or sealant to create a smooth, watertight base for the liner.What red flags should I watch for when hiring a shower liner contractor in Hawthorne?
Beware of contractors who lack a valid California contractor’s license, provide vague written estimates, or refuse to show references from recent local projects. Transparent pricing, clear timelines, and a written warranty are signs of a trustworthy professional.Why does improper sealing cause costly leaks after a shower liner installation?
If the seams and corners aren’t sealed with high‑quality, mold‑resistant silicone, water can infiltrate behind the liner and damage the subfloor. This often leads to expensive repairs such as floor replacement or mold remediation.Can I save money by installing a shower liner myself?
DIY installation can reduce labor costs, but mistakes like misaligned seams or inadequate waterproofing can result in leaks that cost far more to fix. For most homeowners, hiring a certified installer ensures a leak‑free finish and protects your investment.Hawthorne Bathroom Remodel specializes in comprehensive bathroom renovations, bringing over a decade of craftsmanship to homeowners in Hawthorne, CA. Their team combines local knowledge with skilled trades to deliver functional and stylish spaces tailored to each client’s needs.
Need Bathroom Remodel?
We provide fast, reliable home repair services to residents and businesses in Hawthorne, CA and nearby ZIPs (90250, 90280, 90291, 90293). Our teams focus on getting the job done quickly so you can get back to normal.
Get Quick Quote