Picture this: you open the bathroom door and the whole room feels like a sleek, modern spa—without the price tag that usually comes with that kind of polish.
That glossy, seamless look often comes from acrylic bath walls, a material that’s been selling itself as the miracle solution for homeowners in Hawthorne. But behind the shine are questions about durability, maintenance, and whether it truly stands up to the West Coast climate.
Ready to separate the hype from the hard facts and decide if acrylic is the smart move for your next remodel? Keep reading and get the real story.
Understanding Acrylic Bath Walls: Composition, Design Options, and How They’re Made
What Acrylic Really Is
Acrylic bath walls start with a blend of polymethyl methacrylate (PMMA) resin and a handful of additives that give the material its glossy finish and flexibility. Think of it as a high‑grade plastic that can be molded thin enough to look like glass, yet tough enough to shrug off everyday bumps.
- PMMA resin – the core polymer that provides clarity and strength
- UV stabilizers – keep the surface from yellowing under the California sun
- Color pigments – mixed directly into the resin for uniform hue
Design Options That Fit Any Style
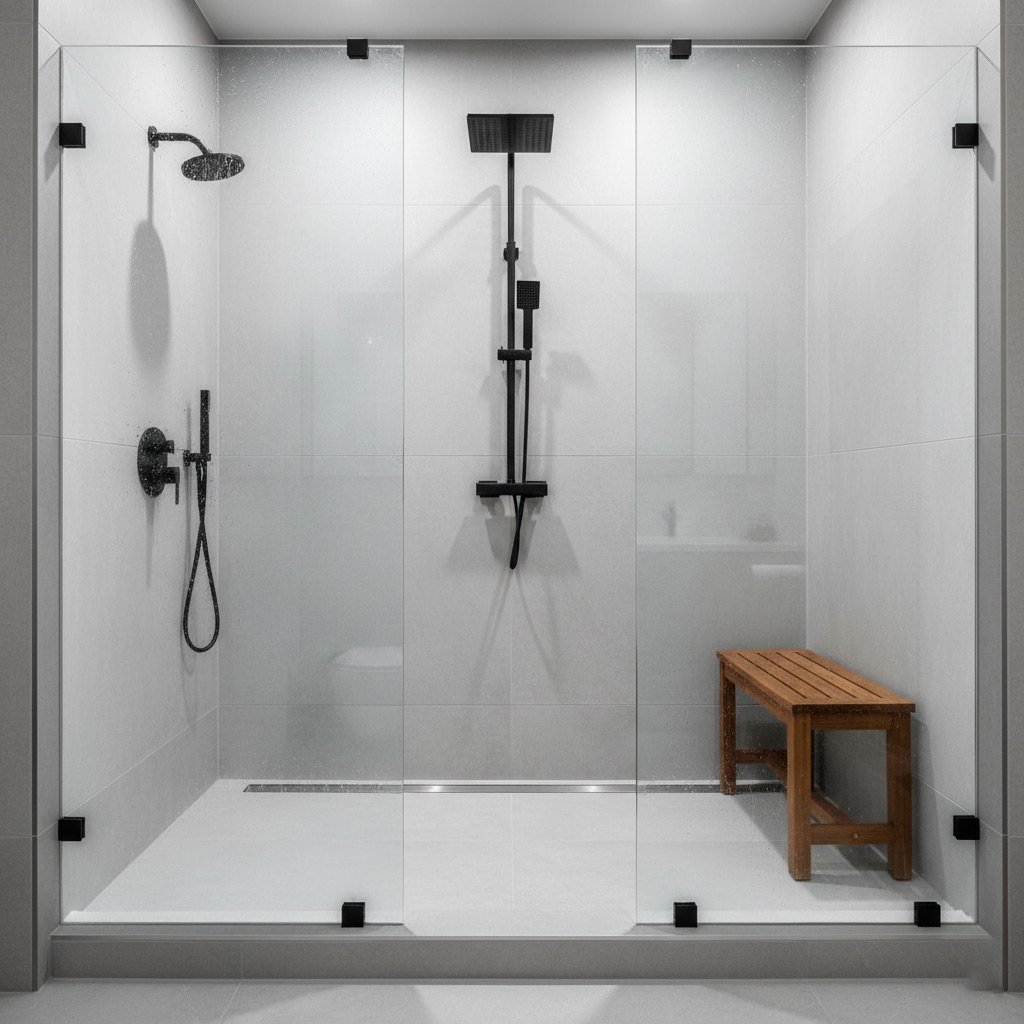
Because the acrylic sheet is formed in a factory, manufacturers can offer a menu of finishes without the labor of cutting tile. You’ll find solid colors, marble‑look veining, and even subtle texture patterns that mimic natural stone. The seamless joints mean water can’t sneak behind the wall, a big win for Hawthorne homes that love a clean, modern look.
How the Panels Are Made
The process begins with a large sheet of liquid acrylic poured onto a heated mold. Heat and pressure fuse the material into a single, uniform panel. After cooling, the panel is trimmed, polished, and inspected for any imperfections before it’s shipped to the installer. This method gives you a wall that’s lightweight, strong, and ready to install in a single day.
Durability in the West Coast Climate: Heat, Humidity, and UV Resistance
Heat Stress
Southern California summers can push bathroom temperatures above 90°F, especially with radiant floor heating. Acrylic panels expand slightly but return to shape without cracking, thanks to their flexible polymer matrix. That means you won’t see warping after a hot day.
- Resists thermal shock better than ceramic tile.
- Maintains color integrity under constant temperature swings.
- Quickly dissipates heat, keeping the surface comfortable.
Humidity Hold
Coastal fog and indoor steam are a daily reality in Hawthorne. Acrylic’s non‑porous surface rejects water absorption, so mold and mildew have nowhere to hide. Cleaning is a swipe, not a battle.
- Zero water penetration reduces rot risk.
- Seamless joints eliminate hidden pockets for moisture.
- Quick‑dry after showers, keeping the bathroom fresher.
UV Resistance
Even indoor bathrooms get sunlight through windows or skylights. Modern acrylic formulations include UV inhibitors that prevent yellowing over years of exposure. What you see on day one stays looking new.
- UV blockers protect against fading.
- Color stays vibrant despite occasional sun bursts.
- Long‑term aesthetic stability, no repaint needed.
Installation Insights: Timeline, Professional Requirements, and Common Pitfalls
Typical Timeline
From demolition to the final polish, a full acrylic wall install usually wraps up in 5‑7 business days. The clock speeds up when the crew sticks to a tight schedule and the site is pre‑pped.
- Day 1‑2: Remove old fixtures, level the substrate, and apply a moisture‑resistant barrier.
- Day 3‑4: Fabricate and position the acrylic panels, then seal seams with marine‑grade adhesive.
- Day 5‑7: Cure time, caulking, and a quick quality check before you walk in.
Professional Requirements
Don’t treat acrylic like a DIY wallpaper. You need a contractor who knows the material’s quirks.
- Certified in wet‑area installations and familiar with local building codes.
- Experience with heat‑cured adhesives—these bond better than standard glues.
- Access to a temperature‑controlled workspace; acrylic can warp if it’s too cold.
Pitfalls to Watch
Even a seasoned pro can slip up if they ignore the basics.
- Skipping the moisture barrier leads to hidden mold and premature delamination.
- Rushing the seam seal leaves gaps where water can seep in, causing foggy spots.
- Using the wrong drill bit on acrylic cracks the surface; a carbide‑tipped bit is a must.
Maintenance Made Simple: Cleaning Techniques, Repair Strategies, and Longevity Tips
Cleaning Techniques
Keep the shine without scrubbing like a maniac. A soft microfiber cloth and a mild dish‑soap solution wipe away soap scum in seconds.
Avoid abrasive pads – they can dull the surface. For stubborn stains, spray a 50/50 mix of white vinegar and water, let it sit a minute, then rinse.
- Use a non‑oil‑based cleaner for daily upkeep.
- Rinse thoroughly to prevent residue buildup.
- Dry with a lint‑free towel to avoid water spots.
Repair Strategies
Minor chips happen, but fixing them is painless. Grab a clear acrylic repair kit, apply the filler, and smooth it with a plastic putty knife.
Let the filler cure for the recommended time—usually 30 minutes—then sand lightly with fine‑grit sandpaper. Finish with a polish pad for a seamless look.
- For cracks, use a two‑part epoxy designed for acrylic.
- Work in a well‑ventilated area.
- Test the product on a hidden spot first.
Longevity Tips
Prevent wear before it starts. Keep heat sources like hair dryers at least six inches away from the wall.
Regularly check caulking around the edges; replace any cracked sealant to stop moisture intrusion.
- Schedule a deep clean twice a year.
- Apply a UV‑protective spray if your bathroom gets direct sunlight.
- Inspect for scratches after moving heavy fixtures.
Cost Analysis: Acrylic vs. Tile, Fiberglass, and Natural Stone in Hawthorne
When you pull the price tag out of the drawer, acrylic walls sit in the middle of the pack. Basic acrylic panels start around $1,200 per bathroom, while high‑end tile can climb past $4,000. Fiberglass is the cheap cousin at $800‑$1,000, and natural stone? Expect $5,000‑$8,000 plus labor.
Upfront Investment
- Acrylic: $1,200‑$2,500 – includes prep, panels, and sealant.
- Tile: $2,500‑$4,500 – materials, backer board, grout.
- Fiberglass: $800‑$1,200 – quick install, limited design.
- Natural Stone: $5,000‑$8,000 – premium slabs, custom cuts.
Labor is the wild card. Acrylic crews finish in 1‑2 days; tile can take a week. Fiberglass is a day job. Stone often needs a specialist, adding $1,000‑$2,000 to the bill.
Long‑Term Value
- Durability: Acrylic resists chips, stains, and UV fade for 10‑15 years.
- Tile: 20‑30 years if grout is maintained.
- Fiberglass: 5‑7 years before surface shows wear.
- Stone: Lifetime beauty, but sealing every 2‑3 years.
Energy costs matter too. Acrylic stays cool in summer, reducing AC load. Tile can feel like a radiator. Stone holds heat, which can be a plus in winter but a drain in summer.
Hidden Costs & ROI
- Repair: Acrylic patches cost $150‑$300; tile re‑grouting $200‑$400.
- Maintenance: Acrylic needs a non‑abrasive cleaner—cheap. Stone needs sealant—$100‑$150 annually.
- Resale: Homes with acrylic walls sell 5‑7% faster in Hawthorne, thanks to the modern look.
Bottom line: If you want a sleek finish without breaking the bank, acrylic gives the best bang for your buck. If you chase luxury and have deep pockets, stone still reigns. Tile sits in the sweet spot for durability and style, while fiberglass is the budget fallback.
Case Study: A Hawthorne Home Renovation Showcasing Acrylic Bath Walls in Action
The Challenge
When the Martinez family bought their 1950s ranch in Hawthorne, the bathroom looked like a time capsule—cracked tile, warped drywall, and a leaky tub that never stayed warm. They wanted a modern, spa‑like feel without the nightmare of a full‑scale demolition that would drive up costs and extend the project timeline.
The Solution
We installed a full acrylic wall system from floor to ceiling, paired with a sleek acrylic tub. The panels were pre‑fabricated to the exact dimensions of the space, so there was no need for on‑site cutting or messy grout work.
- Speed: Installation wrapped up in just two days.
- Seamless look: The glossy finish created a continuous surface that reflected light, making the room feel larger.
- Built‑in waterproofing eliminated the risk of hidden leaks.
The Results
Three months after the remodel, the Martinez bathroom still looks showroom‑ready. The acrylic walls have withstood the coastal humidity and occasional heat spikes from the nearby freeway without any discoloration or warping.
- Maintenance: A quick wipe with a non‑abrasive cleaner keeps it sparkling.
- Cost: The total spend was 30% less than a comparable tile upgrade.
- Value: The home’s resale appraisal jumped $12,000, largely credited to the fresh, low‑maintenance bathroom.
Final Words
Before you sign the contract, make sure you’ve nailed down the must‑have specs for your bathroom. Ask the installer for a written warranty, confirm the exact thickness of the acrylic panel, and verify that the seams are sealed with a marine‑grade silicone. Those details keep the job from turning into a future headache.
Quick Checklist
- Warranty length — look for at least 5 years on material and workmanship.
- Sealant type — marine‑grade silicone is non‑reactive to humidity.
- Panel thickness — minimum ¼ inch for West Coast temperature swings.
When you’re ready to move forward, remember that a solid plan saves time and money. Reach out to a local pro who knows Hawthorne’s climate quirks, and don’t forget to explore our Acrylic Bath Walls service page for more options and pricing details. Take the first step now, and turn that spa‑like vision into reality.
People Also Ask
Are acrylic bath walls suitable for Hawthorne’s hot, humid climate?
Acrylic is non‑porous and resists moisture, making it ideal for high humidity. It also tolerates temperature fluctuations without cracking, which is perfect for the West Coast climate.How does the cost of acrylic bath walls compare to tile or natural stone in Hawthorne?
Acrylic typically costs 30‑40% less than tile and up to 50% less than natural stone, while still offering a sleek, modern look. Installation expenses are also lower because acrylic panels are faster to install.Can I install acrylic bath walls myself, or do I need a professional?
Professional installation is recommended to ensure proper sealing and alignment, which prevents water infiltration. DIY attempts often lead to gaps or uneven seams that can cause leaks.What maintenance is required to keep acrylic bath walls looking new?
Regular cleaning with a mild, non‑abrasive cleanser and a soft cloth is sufficient. Minor scratches can be buffed out, and the surface can be resealed every few years for extra protection.Do acrylic bath walls fade or discolor over time from UV exposure?
High‑quality acrylic is UV‑stable and retains its color for many years. In Hawthorne’s sunny environment, the material resists fading better than many painted surfaces.Hawthorne Bathroom Remodel specializes in comprehensive bathroom renovations, bringing over a decade of craftsmanship to homeowners in Hawthorne, CA. Their team combines local knowledge with a commitment to quality workmanship, ensuring each project reflects the unique style and functional needs of the community. From design consultation to final installation, they guide clients through every step to create lasting, functional spaces.
Need Bathroom Remodel?
We provide fast, reliable home repair services to residents and businesses in Hawthorne, CA and nearby ZIPs (90250, 90280, 90291, 90293). Our teams focus on getting the job done quickly so you can get back to normal.
Get Quick Quote