Picture this: you open the bathroom door and the first thing you see is a sleek, modern vanity that looks like it was plucked from a design magazine, not the dated piece you’ve been wrestling with for years.
Smart homeowners in Hawthorne know that swapping out that old cabinet isn’t just about looks—it’s a shortcut to higher resale value, better storage, and a daily dose of pride every time they brush their teeth.
Ready to discover the exact steps these savvy locals take to turn a tired vanity into a show‑stopper? Keep reading and you’ll see how easy it can be.

Assessing Your Existing Vanity: Identifying Issues and Opportunities
First thing’s first—stand in front of the vanity and ask yourself if it still feels like a piece of furniture or a relic. Look for warped doors, cracked countertops, and hardware that sticks like it’s been glued on for decades. Those visual clues are the low‑cost alarm bells that tell you a replacement is overdue.
Next, run a quick functional test. Open every drawer and cabinet; if anything jams, it’s a sign the internal hardware is failing. Check the faucet and plumbing for leaks, rust, or a drip that won’t quit. Even a tiny drip can waste gallons of water and add up on your utility bill.
What to Look For
- Structural damage – sagging frames or water‑stained wood.
- Insufficient storage – shallow drawers that can’t hold everyday essentials.
- Outdated style – colors and finishes that clash with modern fixtures.
- Improper dimensions – a vanity that crowds the shower or blocks the door swing.
Budget Planning and Material Selection for Hawthorne Homes
First thing’s first: write down a hard‑stop number. Know your ceiling before you start eye‑balling countertops and cabinet doors. Include the price of the vanity itself, labor, disposal fees, and a little wiggle room for surprise expenses—like a hidden pipe that decides to pop up during demolition.
Choosing the Right Material
Material choice drives both cost and longevity. Pick a surface that can survive daily splashes, kids’ toothbrushes, and the occasional hair‑dryer mishap.
- Solid wood: Warm look, but pricey and can warp in humid climates.
- MDF with a high‑gloss veneer: Budget‑friendly, smooth finish, but less resistant to water damage.
- Quartz or marble tops: Premium feel, virtually stain‑proof, but adds a noticeable bump to the bill.
- Laminate: Easy to clean, cheap, but may look cheap if paired with high‑end hardware.
Stretching Your Dollar
Don’t let price tags dictate style. Mix and match—use a modest cabinet material paired with a standout countertop to create visual punch without blowing the budget.
- Shop local salvage yards for reclaimed wood doors; you get character and a discount.
- Ask contractors for off‑season discounts; many schedule work slower in winter.
- Consider a ready‑to‑assemble vanity kit; you save on labor and often get a warranty.
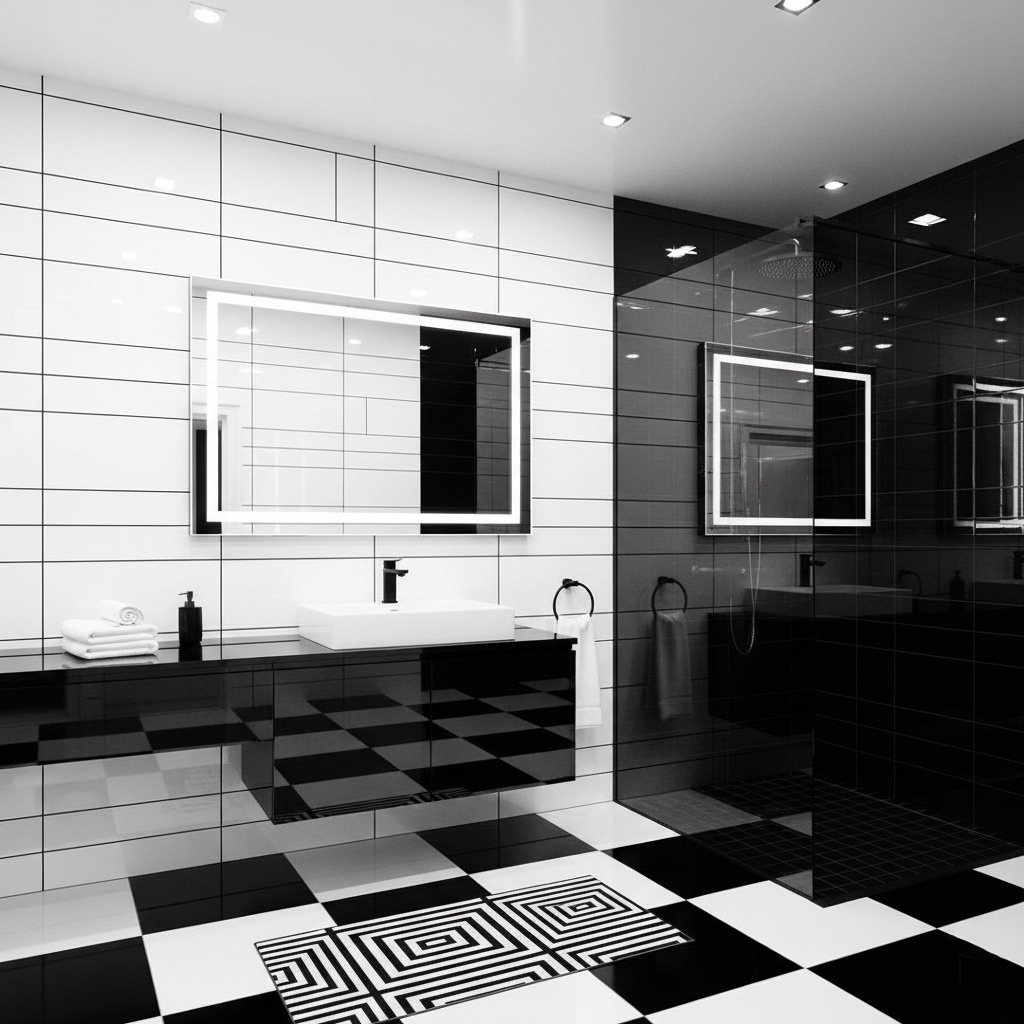
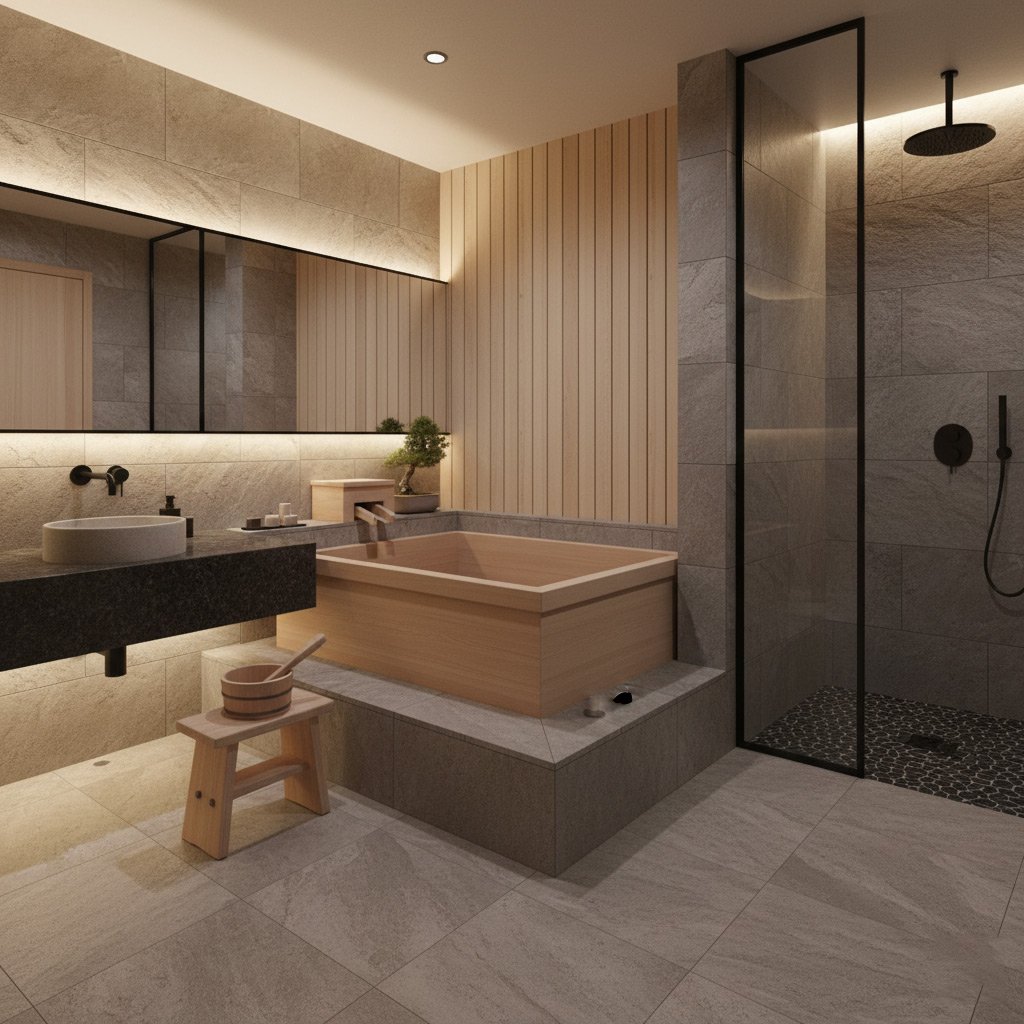
Choosing the Ideal Style, Size, and Layout to Match Your Space
Style Matters
First, decide the vibe you want. Modern means clean lines, matte finishes, and hidden hardware. Traditional leans on raised panels, warm wood tones, and classic knobs. Pick one and stick with it—mixing styles in a small bathroom creates visual noise.
- Matte black or brushed nickel hardware for a contemporary feel.
- Soft‑close drawers to keep the look sleek.
- Glass or acrylic countertop for a light‑filled look.
Size That Fits
Measure twice, buy once. A vanity that’s too big will choke the room; too small and you’ll be hunting for space. Aim for a width that leaves at least 30 inches of clear floor on each side of the door.
- Standard single‑sink: 30‑36 inches wide.
- Double‑sink: 48‑60 inches, but only if the room is 8 feet or wider.
- Depth: 18‑21 inches keeps the bathroom from feeling cramped.
Layout Tricks
Think about traffic flow. The vanity should sit where you can step in and out without bumping into the tub or toilet. Align the sink with the mirror—this creates a natural line of sight and makes the space feel larger.
- Place the faucet on the wall if you want a floating vanity.
- Use a wall‑mounted cabinet to free up floor space.
- Consider a corner vanity for oddly shaped bathrooms.
DIY Installation vs. Hiring Professionals: Pros, Cons, and Cost Breakdown
DIY: What You Gain
Rolling up your sleeves can shave off a few hundred dollars and give you bragging rights. Nothing feels better than tightening the last screw yourself. Just remember, a mis‑aligned vanity can turn a quick win into a costly redo.
- Cost savings: No labor fees, only materials.
- Flexibility: Work on your schedule, not the contractor’s.
- Skill boost: You’ll learn plumbing basics and cabinet handling.
DIY: The Pitfalls
Without experience, you risk water leaks, uneven countertops, or stripped screws. One slip can ruin a whole bathroom remodel. If you’re not comfortable with plumbing, the headache may outweigh the savings.
- Potential for hidden damage.
- Time‑consuming – weekends disappear fast.
- Limited warranty on workmanship.
Hiring a Pro: What You Get
Professional installers bring precision, speed, and a guarantee that the job is done right. They know the code, the quirks of Hawthorne homes, and how to avoid costly mistakes. The price tag is higher, but the peace of mind is priceless.
- Expertise in plumbing and electrical connections.
- Warranty on labor and often on the vanity itself.
- Fast turnaround – most jobs finish in a day.
Cost Breakdown
Here’s a quick snapshot of where your money goes.
- DIY: Materials $800‑$1,200 + your time.
- Pro install: Materials $800‑$1,200 + labor $300‑$600.
- Unexpected issues (water damage, code fixes) add $150‑$400.
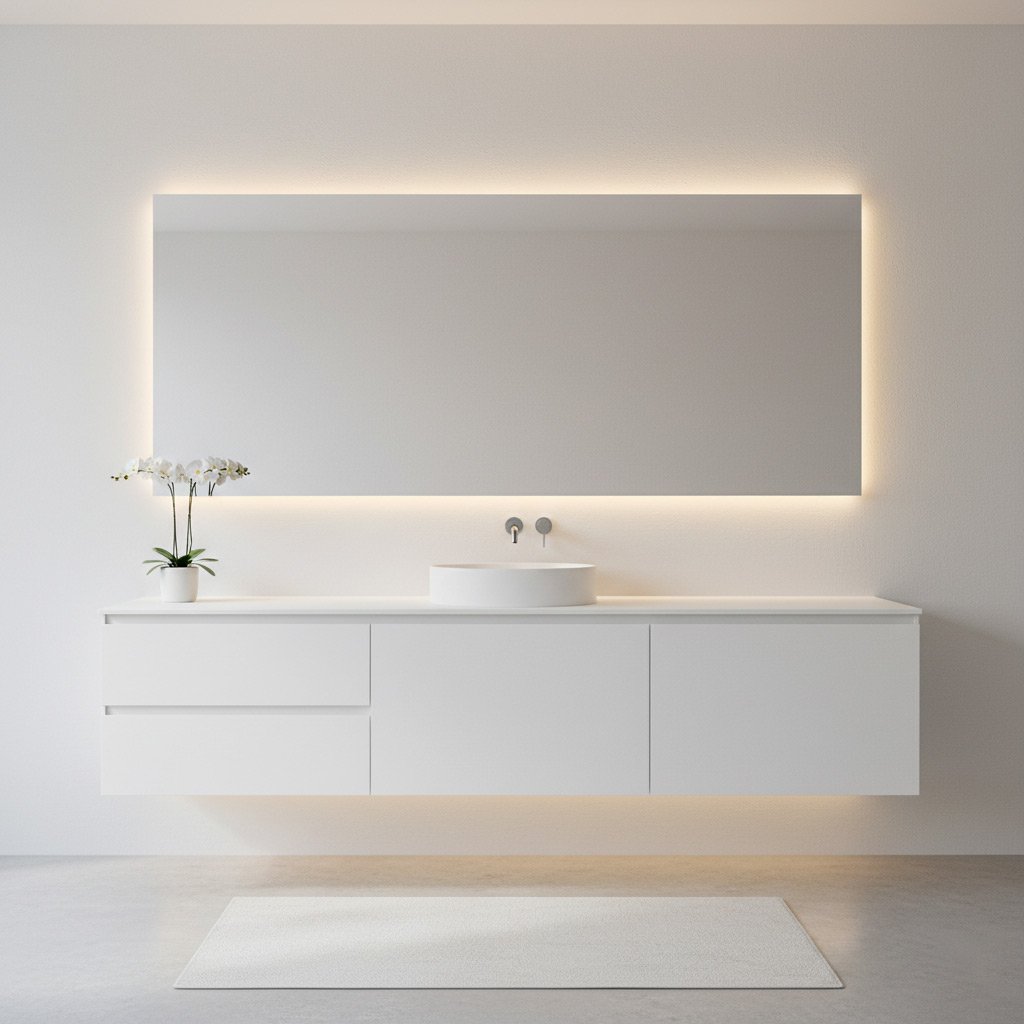
Enhancing Storage and Functionality with Modern Design Features
Pull‑Out Power and Organization
Think of a vanity that *does* work for you, not against you. Pull‑out drawers with soft‑close mechanisms keep toiletries hidden but within arm’s reach, while built‑in dividers separate brushes, razors, and cosmetics.
Adding a narrow vertical organizer on the side creates a mini‑closet for hair tools and cleaning supplies. No more digging around in a cluttered cabinet.
Integrated Lighting and Smart Mirrors
LED strips tucked under the countertop illuminate the sink without harsh glare. Pair them with a motion‑sensor mirror that brightens when you step in, and you’ve got a bathroom that feels like a boutique.
Some homeowners even install a Bluetooth speaker behind the vanity for a subtle soundtrack while they get ready. It’s a small upgrade that makes a big impression.
Hidden Hampers and Multi‑Use Surfaces
Modern vanities often feature a concealed laundry hamper that slides out on a quiet rail. You toss dirty clothes in, close the door, and the bathroom stays tidy.
Top‑mount countertops with a recessed groove can hold a slim charging dock for phones or a small tray for daily meds. Every square inch earns its keep, turning a plain vanity into a powerhouse of convenience.
Case Study: How a Hawthorne Family Turned a Dated Vanity into a Show‑Stopper
When the Martinez family first walked into their 1998 bathroom, the old oak vanity looked like a relic from a bygone era. They wanted a fresh look without breaking the bank, and they were determined to keep the remodel under a tight timeline before the kids headed back to school.
The Game Plan
They started by measuring the space, noting the awkward 30‑inch depth that ate up precious floor room. Next, they chose a floating, wall‑mounted vanity that shaved 6 inches off the footprint and added a sleek quartz countertop. The final checklist included:
- Cabinet finish: matte white lacquer for a clean, modern vibe.
- Hardware: brushed nickel pulls that catch the light.
- Lighting: LED strip under the vanity for a soft glow.
- Storage hacks: pull‑out drawers with dividers for cosmetics and towels.
Instead of tackling the plumbing themselves, they hired a local contractor who completed the rough‑in in a single day. The family handled the demolition and painting, saving a few hundred dollars and feeling the satisfaction of a hands‑on project.
The Payoff
Within two weeks, the bathroom transformed from drab to fab. The new vanity not only boosted curb appeal, it added 12 extra inches of usable storage—enough to hide the clutter that used to spill onto the floor. When the Martinez’s listed their home later that year, the upgraded bathroom was the top talking point for every showing.
Final Words
Before you swing that hammer, lock in the details that keep the project from turning into a headache. A quick checklist can save you from costly re‑work:
- Measure twice, order once – double‑check width, depth, and height.
- Confirm the plumbing rough‑in matches the new vanity’s drain pattern.
- Secure a written warranty from the supplier; it’s your safety net.
What to Do Next
Take the momentum and schedule a consultation. A pro will walk you through:
- Material options that survive Hawthorne’s humidity.
- Design tweaks that add hidden storage without sacrificing style.
- Timeline estimates so you can plan around work or school schedules.
Remember, a vanity isn’t just a piece of furniture—it’s the centerpiece of your daily routine. Nail the basics, pick the right partner, and you’ll walk into a bathroom that feels brand new every morning.
People Also Ask
What are the first steps Hawthorne homeowners should take before replacing a bathroom vanity?
Assess the current vanity for damage, water leaks, and inadequate storage. Measure the space accurately and note plumbing locations to ensure the new unit will fit and connect properly.How can I choose a vanity style that complements Hawthorne’s architectural vibe?
Consider the neighborhood’s prevalent design themes—mid‑century modern, coastal, or contemporary—and select finishes, hardware, and cabinet lines that echo those elements. Pair the vanity with complementary tile or countertop materials for a cohesive look.Is it more cost‑effective to install a vanity myself or hire a professional in Hawthorne?
DIY installation can save labor costs but requires plumbing and carpentry skills; mistakes may lead to hidden expenses. Hiring a licensed contractor ensures proper installation, permits, and warranty protection, often resulting in a better long‑term investment.What modern features add the most value to a vanity replacement?
Integrated LED lighting, soft‑close drawers, and built‑in organizers boost functionality and appeal. Adding a quartz or marble countertop and water‑resistant hardware also enhances durability and resale value.How long does a typical vanity replacement project take in a Hawthorne home?
A straightforward swap usually takes 1–2 days for demolition, installation, and finishing touches. More extensive remodels with plumbing rerouting or custom cabinetry can extend the timeline to a week or longer.Hawthorne Bathroom Remodel specializes in comprehensive bathroom renovations, bringing over a decade of craftsmanship to homeowners throughout Hawthorne, CA. Their team combines local knowledge with meticulous attention to detail to deliver functional and stylish spaces. Committed to personalized service, they guide clients from design through installation, ensuring each project reflects the community’s unique character.
Need Bathroom Remodel?
We provide fast, reliable home repair services to residents and businesses in Hawthorne, CA and nearby ZIPs (90250, 90280, 90291, 90293). Our teams focus on getting the job done quickly so you can get back to normal.
Get Quick Quote